|
Videofied Direct View This Help File Page was last Modified on 06/13/2013 |

|

|
|
|
Videofied Direct View This Help File Page was last Modified on 06/13/2013 |
|
|
Videofied Direct View
This Help File Page was last Modified on 06/13/2013
|
Videofied Direct View This Help File Page was last Modified on 06/13/2013 |
|
|
|
|
Videofied Direct View This Help File Page was last Modified on 06/13/2013 |
|
|
| □ | Under Development |
| □ | The Videofied Direct View system provides the >>>>>>>>>>>>>>>> |
| □ | Videofied Setup Instructions: |
| ► | Note 1: These steps are performed at the computer on which SPA is installed and used. |
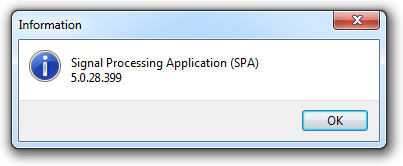
| ► | Note 2: The use of this Videofied Direct View application requires SPA Version 5.0.28.274 or newer (higher Version Number). |
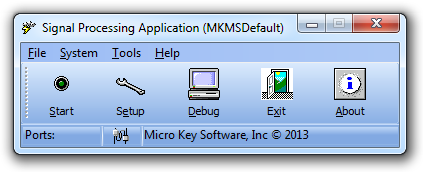
SPA - Signal Processing Application menu
| • | Add Videofied as a Receiver: |
| • | Select File on the SPA Main Menu and Choose the Setup option which opens the Setup Form shown below. |
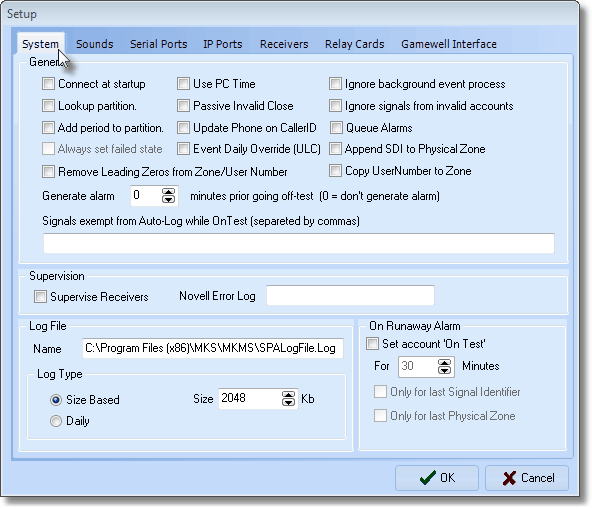
SPA Setup Form - System tab
| • | Click the Receivers tab on the Setup Form to display the current list of Receiver Definitions. |
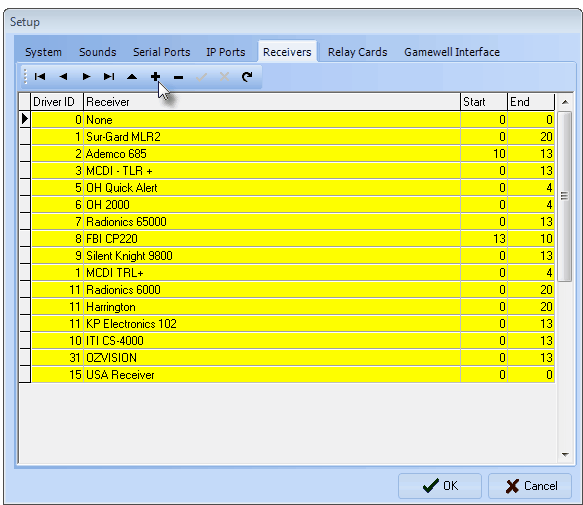
SPA - Setup Form - Receivers tab
| • | Click Add ("+") - see the mouse pointer in the illustration above - to open the New Driver dialog. |
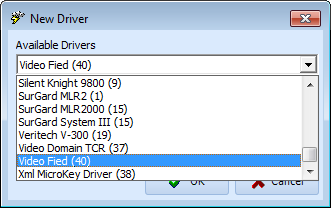
New Driver dialog - Available Drivers field
| ▪ | Available Drivers - Using the Drop-Down Selection List provided, Select the Video Fied (40) option. |
| ▪ | Click the OK übutton to insert this information into the list of Receiver Definitions in the Receivers tab on the Setup Form. |

| o | In the last two columns (Start and End) enter 0 and 3 respectively (as shown above). |
| ▪ | Click the Save ü Icon at the top of the Receivers tab to record this entry. |
| • | Select the IP Ports tab on the Setup Form. |
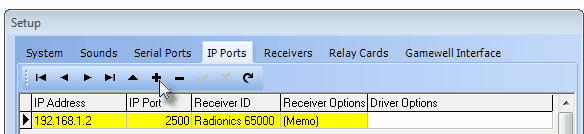
SPA - Setup Form - IP Ports tab - Add option
| ▪ | Click Add ("+") to insert a blank data line which is to be filled in as follows: |
| o | IP Address - Enter "192.168.1.4" which is the IP Address of the Videofied Receiver. |
| o | IP Port - Enter "1556" as the IP Port Number. |
| o | Receiver ID - Use the Drop-Down Selection List to Choose the "Video Fied (40)" option as the Receiver to be connected to this IP Port. |
| o | Receiver Options - Click {Memo} to insert the word {General} and tab to the next field. |
| o | Driver Options - Enter "\Server" as the Driver Option. |
| ▪ | Click the OK übutton to insert this information into the list of IP Ports in the IP Ports tab on the Setup Form. |
| • | Click the OK übutton to Close the Setup Form. |
| • | If SPA is currently running, Click the Stop button. |
| • | Exit SPA, |
| • | Restart SPA |
| • | Update the Windows® system Registry: |
| • | At the computer on which SPA is installed and used, Click the Windows® Start button at the bottom left of the Desktop. |
| • | In the Search field, type "Run" |
| • | Locate the Run Program (probably at the top of the Search Results list) |
| • | Select this program (or just Press Enter. to view the Run Open: field. |
| • | In that Open: field, enter "regedit" then Click the OK button |
| • | ><><><><<<><><><><><><><><><><>><><><><> |