| □ | Tabs for saving space - Some Forms may have tabs which provide space for additional information about the Master subject. |
| • | These tabs are used to provide additional space for information about this Master Form's subject. |
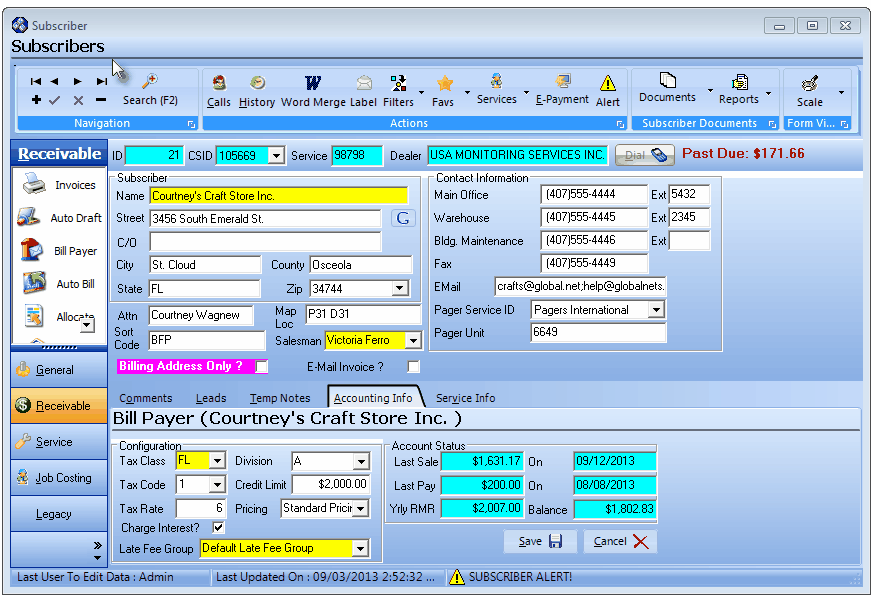
| • | The Master Form (a Subscribers Form sample appears below) has several tabs located below the main information area. |
| • | Because these subordinate Forms are one for one (there is only one Accounting Info Form for each Subscriber Form) the sub-Forms are accessed by Clicking on tabs labeled for their purpose. |
| • | The Accounting Info tab is currently selected and shows the Configuration and Account Status information for this Subscriber. |
| • | Using Tabs to display specific data reduces screen clutter by showing only the data you need to see for your current purpose, but allowing instant access to the additional information when required. |
Subscribers Form - Accounting Info tab
| □ | Two Section - Maintenance and Special Purpose Forms |
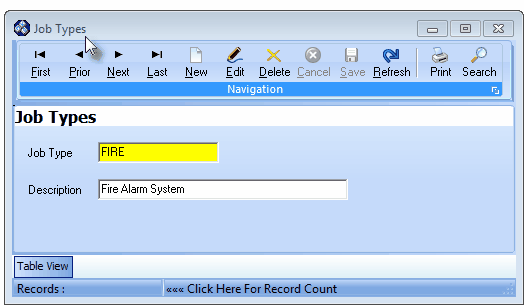
Typical Maintenance Form
| • | These Maintenance and Special Purpose Forms may be Re-sized by Dragging the Top and/or Bottom up or down, and/or the Right side in or out. |

| • | This Navigation Menu provides the normal Record Movement, New, Edit, Delete, Cancel, Save, and Refresh options; as well as a Print, Search and access to other more specialized functions. |
| • | Table View tab - A tabular (spreadsheet style) Table View of the currently defined records is accessible by Clicking the Table View tab at the bottom of the Form |

| • | There are two or more columns of data displayed in this Table View: |
| ▪ | This Table View information may be Pinned in Place by Clicking the Pin Icon on the right. |
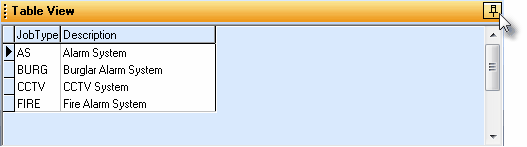
Table View Pinned Open
| ▪ | You may Un-Pin this Table View by Clicking the Pin Icon again. |
| • | Each column's Header Name describes the data contained in that column. |
| ▪ | Clicking on a Header Name will set the order in which these records will be listed. |
| ▪ | Clicking on the same Header Name will set the order in the opposite direction (ascending vs. descending). |
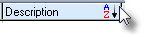
| ▪ | The Header Name that is determining the Order of the list will have an Icon indicating the Order displayed next to that Header Name. |
| • | Click the  Icon to start an entry in the Record Editing section. Icon to start an entry in the Record Editing section. |
| • | Enter the required information. |
| • | Click the  Icon to to record the entry. Icon to to record the entry. |
| • | Any number of records may be identified, as required. |
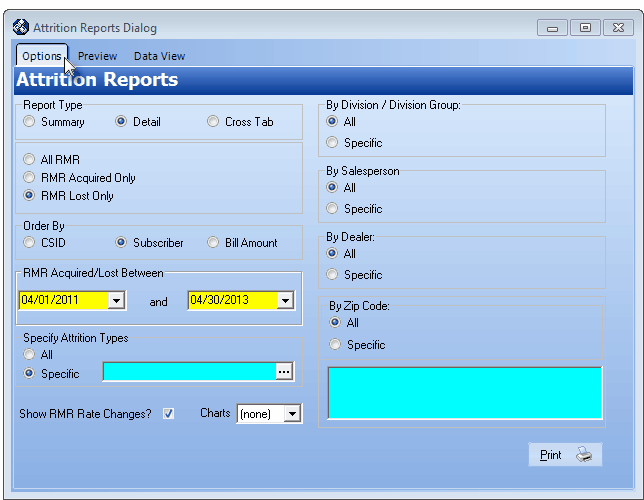
| □ | Tabs for accessing multiple features - Print dialogs often use multiple tabs to Set Printing Options, Preview the select Data, and offer a tabular view of the data for easy Export. |
| • | Print Options dialogs (a Form that displays all of the available printing options for a specific report) frequently have tabs, also. |
| ► | Note: On some report dialogs, once a set of Options are Chosen for the Report, they become the new default Options. |
These default Options may be reset at any time by simply making a different set of Choices.
Report printing dialog with tabs
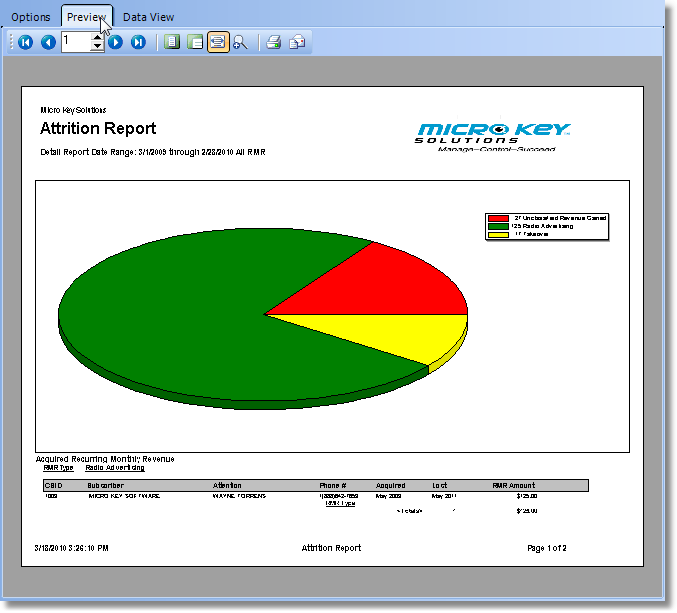
| • | Preview options - For Report dialogs that have the Options and Preview tabs (among others), the most common Preview tab options are: |
| • | Up Arrow/Down Arrow - hi - Moves the report one line up, or one line line down, respectively. |
| • | Page Up/Page Down - Moves the report to the previous or next page, respectively. |

Preview tab Options bar
| • | Home -  - Using either the screen Icon or your Keyboard's Home key, moves the report to the top of the first page. - Using either the screen Icon or your Keyboard's Home key, moves the report to the top of the first page. |
| • | End -  - Using either the screen Icon or your Keyboard's End key, moves the report to the bottom of the last page. - Using either the screen Icon or your Keyboard's End key, moves the report to the bottom of the last page. |
| • | Arrows - The arrows allow you to move back and forth, from page to page. |
| • | Number - Indicates the page number you are viewing. |
| • | Fit To Page - Click the first button after the arrows to size a full page of the report to fit the screen. |
| • | Zoom To 100% - Click the second button after the arrows to display the page at 100% (of the printed view). |
| • | Fit To Page Width - Click the third button after the arrows to size the page of the report to fit the full width of the screen. |
| • | Zoom To Percentage - Click the fourth button after the arrows to re-size the page of the report by percentage. |
| • | Print - Click the Print button  to Print (to a File or a Printer) the displayed Report. to Print (to a File or a Printer) the displayed Report. |
| • | Email - Click the Email button  to send the Report to an Email Address of your choosing. to send the Report to an Email Address of your choosing. |
| • | Charts - Pie and Bar Charts may be produced when printing some reports. |
| ▪ | Report Charts must be set to True ("T") in Company Settings to activate this feature. |
| • | Data View options - This tabbed view provides a tabular (spreadsheet style) presentation of the selected data. |
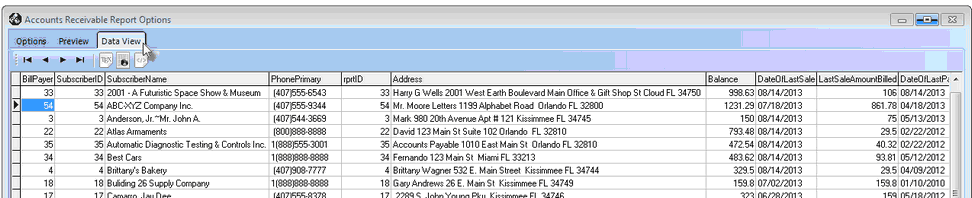
Accounts Receivable Report Data View
| • | Arrows - Click the arrows to move through the record. |
| • | Export - Exporting the data from this Data View Form (note the "fly-over" help available on these buttons): |
| ▪ | Export to CSV - Click the first button after the arrows to export the data to a Comma Separated Values (CSV) file format. |
| ▪ | Export To Excel - Click the second button after the arrows to export the data to an Excel (.xls) file format. |
| ▪ | Export To Html - Click the third button after the arrows to export the data to an HTML formatted file. |
| • | Exit the Form by Clicking the Close box (T) at the top right of the Form |

