| □ | Using the MKMS Printer Setup dialog, the default Printer that is to be used by the current User may be specified. |
| • | From the Main Menu, Select the File Menu and Choose the Printer Setup option. |
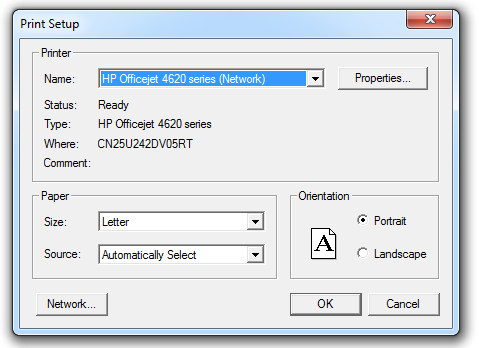
Windows Print Setup dialog
| • | The standard Windows® Print Setup dialog will be displayed. |
| • | Printer section - Using the Drop-Down Selection List provided, Choose the Printer that is to be used as the Default Printer within MKMS. |
| • | Properties - Click the Properties button to change the default settings previously set within the Windows® environment for the selected printer, as appropriate. |
| ▪ | Based on the type (i.e., Make, Model and available options) of the Printer that is selected, each Properties dialog will offer a different set of Layout, Paper/Quality and various Advanced options. |
| ▪ | Referring to the manual for that selected Printer, set these options, as needed. |
| • | Paper section - Set the paper size and source: |
| • | Size - Using the Drop-Down Selection List provided, Choose the Paper's Type/Dimensions that will be in the Source device (selected below). |
| • | Source - Using the Drop-Down Selection List provided, Choose the paper storage device/drawer that will contain the paper size identified above. |
| • | Orientation section - Set to paper's orientation (i.e. Portrait or Landscape). |
| • | Network - In most cases, if the desired Network Printer is available, it will appear automatically in the Printer Drop-Down Selection List. |
| • | If the Printer to be used is installed/connected to a PC located somewhere else on the Network and is not shown, |
| ▪ | Click the Network button to find that Printer. |
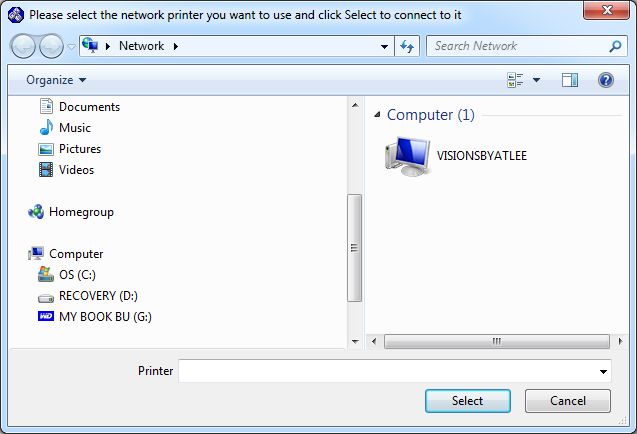
| ▪ | A standard Windows® File Locator dialog will be opened within which the Network Printer may be located. |
| ▪ | Click on the Networked PC to which the required Priter is attached to open a list of its available Printer(s) |
| ▪ | Once the desired Printer is located |
| ▪ | Select (Click on) that Printer. |
| ▪ | Click the Select button. |
| ▪ | The selected Printer will be inserted into the (printer sections's) Name field |
| • | OK - When all required/desired selections are completed, Click the OK button to save these Printer settings. |
| • | The selected Printer will now be the Default Printer when Reports are printed by this User. |

