| □ | The Extended Services dialog displays a series of tabs, each tab identifying a specific Extended Service being offered such as the Identity Theft protection service tab illustrated below. |
| • | To access the Identity Theft tab on the Extended Services Form, on the Subscriber Form's General Menu, Select the Extended Services , and then Choose the Identity Theft tab. |

Extended Services with the Identity Theft tab displayed
| • | Identify Theft - This tab is used to identify the Identity Theft Clients who are being provided the Identity Theft protection service. |

Identity Theft tab on the Extended Services Form
| • | To create an Identity Theft Client, |
| • | Select the Identity Theft tab |
| • | Complete the information in each column listed below: |
| • | Last Name - Enter the client's Last Name. |
| • | First Name - Enter the client's First Name. |
| • | Policy # - This will be assigned by the system when the record is initially saved. |
| • | Start Date - Enter the Starting Date for their Identity Theft protection service using the Drop-Down Date Selection Box provided. |
| • | End Date - Enter the Ending Date for their Identity Theft protection service using the Drop-Down Date Selection Box provided. |
| • | Email - Enter the client's Email address. |
| • | Street1 - Enter the client's Street Number and Street Name. |
| • | Street2 - Enter the client's additional addressing information, if required. |
| • | City - Enter the client's City. |
| • | State - Enter the client's State. |
| • | Zip - Enter the client's Zip Code. |
| • | Mobile - Enter the client's Cell Phone Number (automatic Telephone Number Formatting is enabled). |
| • | Home Phone - Enter the client's Home Phone Number (automatic Telephone Number Formatting is enabled). |
| • | Work Phone - Enter the client's Work Phone Number (automatic Telephone Number Formatting is enabled). |
| • | Click Save ("ü") to record your entry. |
| • | Locating an existing Identity Theft Client: |
| • | Use F2 Search to locate the specific Subscriber who has the Identity Theft Client which needs to be located. |

| • | The Search Identity Theft dialog will be displayed. |
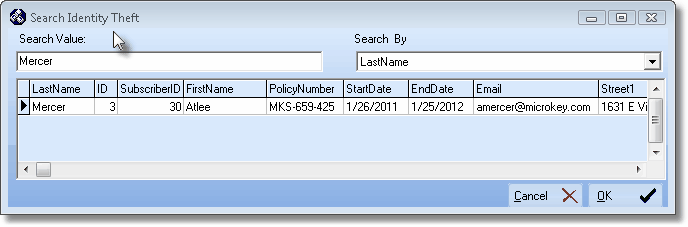
Search Identity Theft dialog
| ▪ | Search By - Use the Drop-Down Selection List provided to Choose the field name that you want to Search By. |
| ▪ | Search Value - Enter the appropriate information to locate the desired Client. |
| ▪ | Click on the desired record. |
| ▪ | Click the OK button to close the Search Identity Theft dialog. |
| ▪ | The record pointer4on the Identity Theft Clients List will indicate the selected Client. |
| • | Sorting the Identity Theft Clients List: |
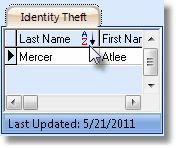
Header Name Sort Order Icon
| • | Each column within the Identity Theft Client List may be set to have the entire List sorted in the order of that column's Header Name. |
| ▪ | If a specific column is determining the order of the data, a Sort Order will be displayed next to that column's Header Name |
| ▪ | See the mouse pointer in the illustration above identifying the Sort Order . |
| • | Click on a specific Header Name and all the Identity Theft Client data will be sorted based on the data type in that column. |
| • | Click the same Header Name and the order of the Identity Theft Client data will be reversed (initially lowest to highest, then highest to lowest). |
| • | Click on a different Header Name and the order of the Identity Theft Client data will be changed to reflect this newly selected Header Name. |

